JSTL은 태그 라이브러리로, 우리가 import하고 include 하던 걸 태그를 통해 진행한다고 보면 된다.
먼저 pom.xml에서 의존성을 추가할 필요가 있다.
이클립스에서는 아래 코드를 추가한다. 위는 JSTL API, 아래는 JSTL 구현체이다.
```
<dependency>
<groupId>jakarta.servlet.jsp.jstl</groupId>
<artifactId>jakarta.servlet.jsp.jstl-api</artifactId>
</dependency>
<dependency>
<groupId>org.eclipse.jetty</groupId>
<artifactId>glassfish-jstl</artifactId>
</dependency>
```
인텔리제이에서 위의 코드를 치면 인식하지 못하는 의존성이 있을텐데, 그거 대신 아래 코드를 추가한다.
```
<dependency>
<groupId>org.glassfish.web</groupId>
<artifactId>jakarta.servlet.jsp.jstl</artifactId>
<version>3.0.1</version>
</dependency>
```
이제 listTodos.jsp에 태그 라이브러리를 추가할 수 있다. 추가할 태그 라이브러리는 `jstl core tags`라고 검색하면 나오는 오라클 페이지의 맨 위에 있는 Standard Syntax에서 확인할 수 있다.
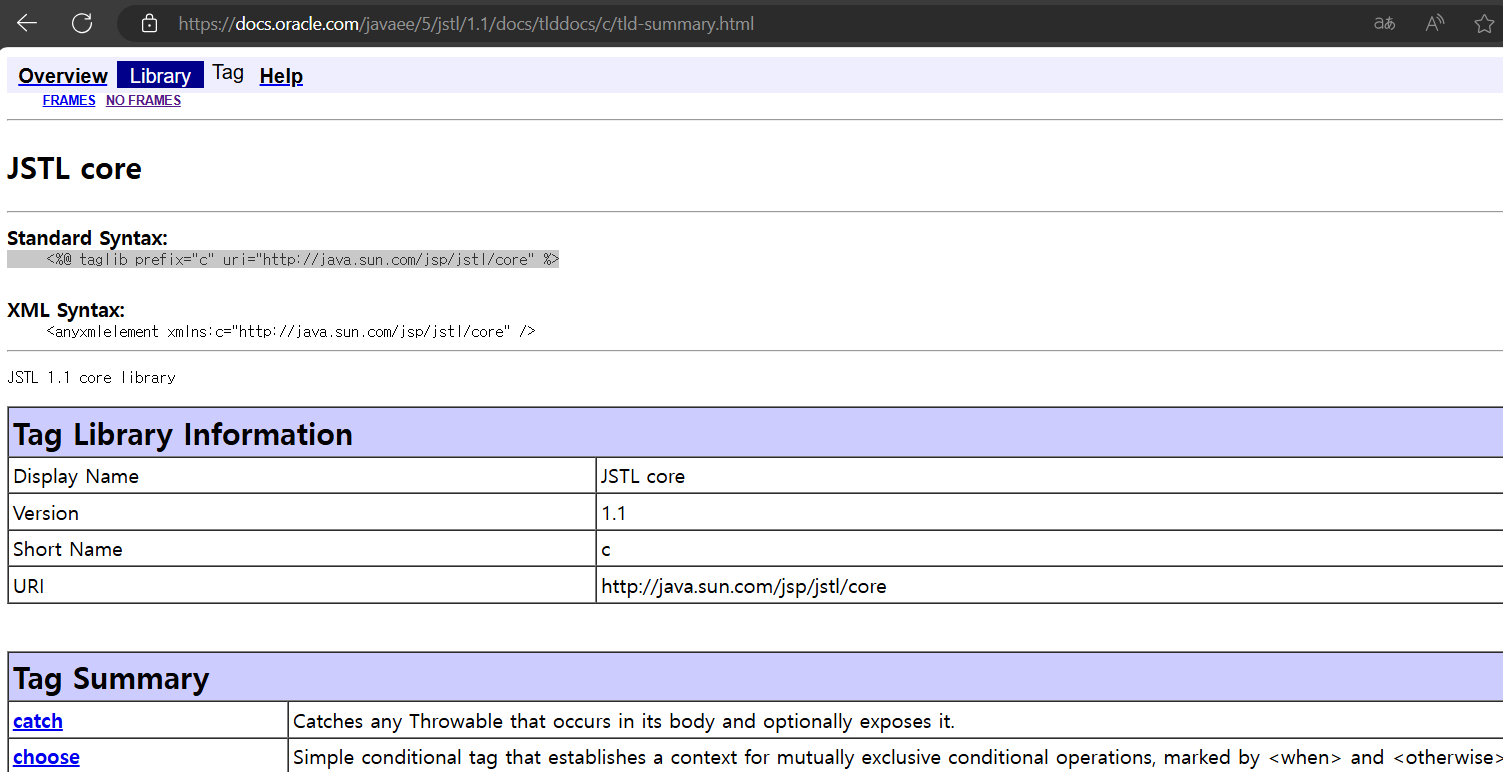
```
<%@ taglib prefix="c" uri="http://java.sun.com/jsp/jstl/core" %>
<html>
<head>
<title>List Todos Page</title>
</head>
<body>
<div>Welcome~!</div>
<div>Your todos are ${todos}</div>
</body>
</html>
```
이제 forEach를 통해서todo의 요소들을 모두 표시하고자 한다. JSTL을 이용한 방법은 아래와 같다.
```
<%@ taglib prefix="c" uri="http://java.sun.com/jsp/jstl/core" %>
<html>
<head>
<title>List Todos Page</title>
</head>
<body>
<div>Welcome~!</div>
<h1>Todos</h1>
<table>
<thead>
<tr>
<th>ID</th>
<th>Description</th>
<th>Target Date</th>
<th>Is Done?</th>
</tr>
</thead>
<tbody>
<c:forEach items="${todos}" var="todo>
<tr>
<td>${todo.id}</td>
<td>${todo.description}</td>
<td>${todo.targetDate}</td>
<td>${todo.done}</td>
</tr>
</tbody>
</table>
</body>
</html>
```
JSTL을 사용하면 이처럼 편하게 html에서 여러 반복문 조건문을 활용할 수 있다.
'강의 > Java Spring Boot' 카테고리의 다른 글
| Spring Security를 이용한 로그인 구현 (0) | 2025.01.26 |
|---|---|
| todolist CRUD 기능 구현하기 (0) | 2025.01.26 |
| 세션, 모델, 그리고 요청 - @SessionAttributes (0) | 2025.01.26 |
| todolist 만들기 (0) | 2025.01.26 |
| 로그인 양식 만들기 (0) | 2025.01.26 |